OpenID Connect
Atomic Enterprise OSSEC (AEO) supports Single Sign On (SSO) via integration with OpenID Connect. A full list of certified providers is available at: https://openid.net/developers/certified/
Requires
AEO 6.0.0+
OpenID Connect Server
AEO 6.0.0+ registration with OpenID Connect Server
Overview
This module is designed to allow SSO and authentication that utilizes the OpenID Connect protocol.
Note
This meets the requirements for SAML authentication
Generic Provider
Step 1: Register AEO with your OpenID Connect endpoint
Note
The process for this is endpoint specific. Refer to your OpenID service provider for more information.
Step 2: Create a user in AEO whose email address matches the email address of the user on file with the OpenID Connect server.
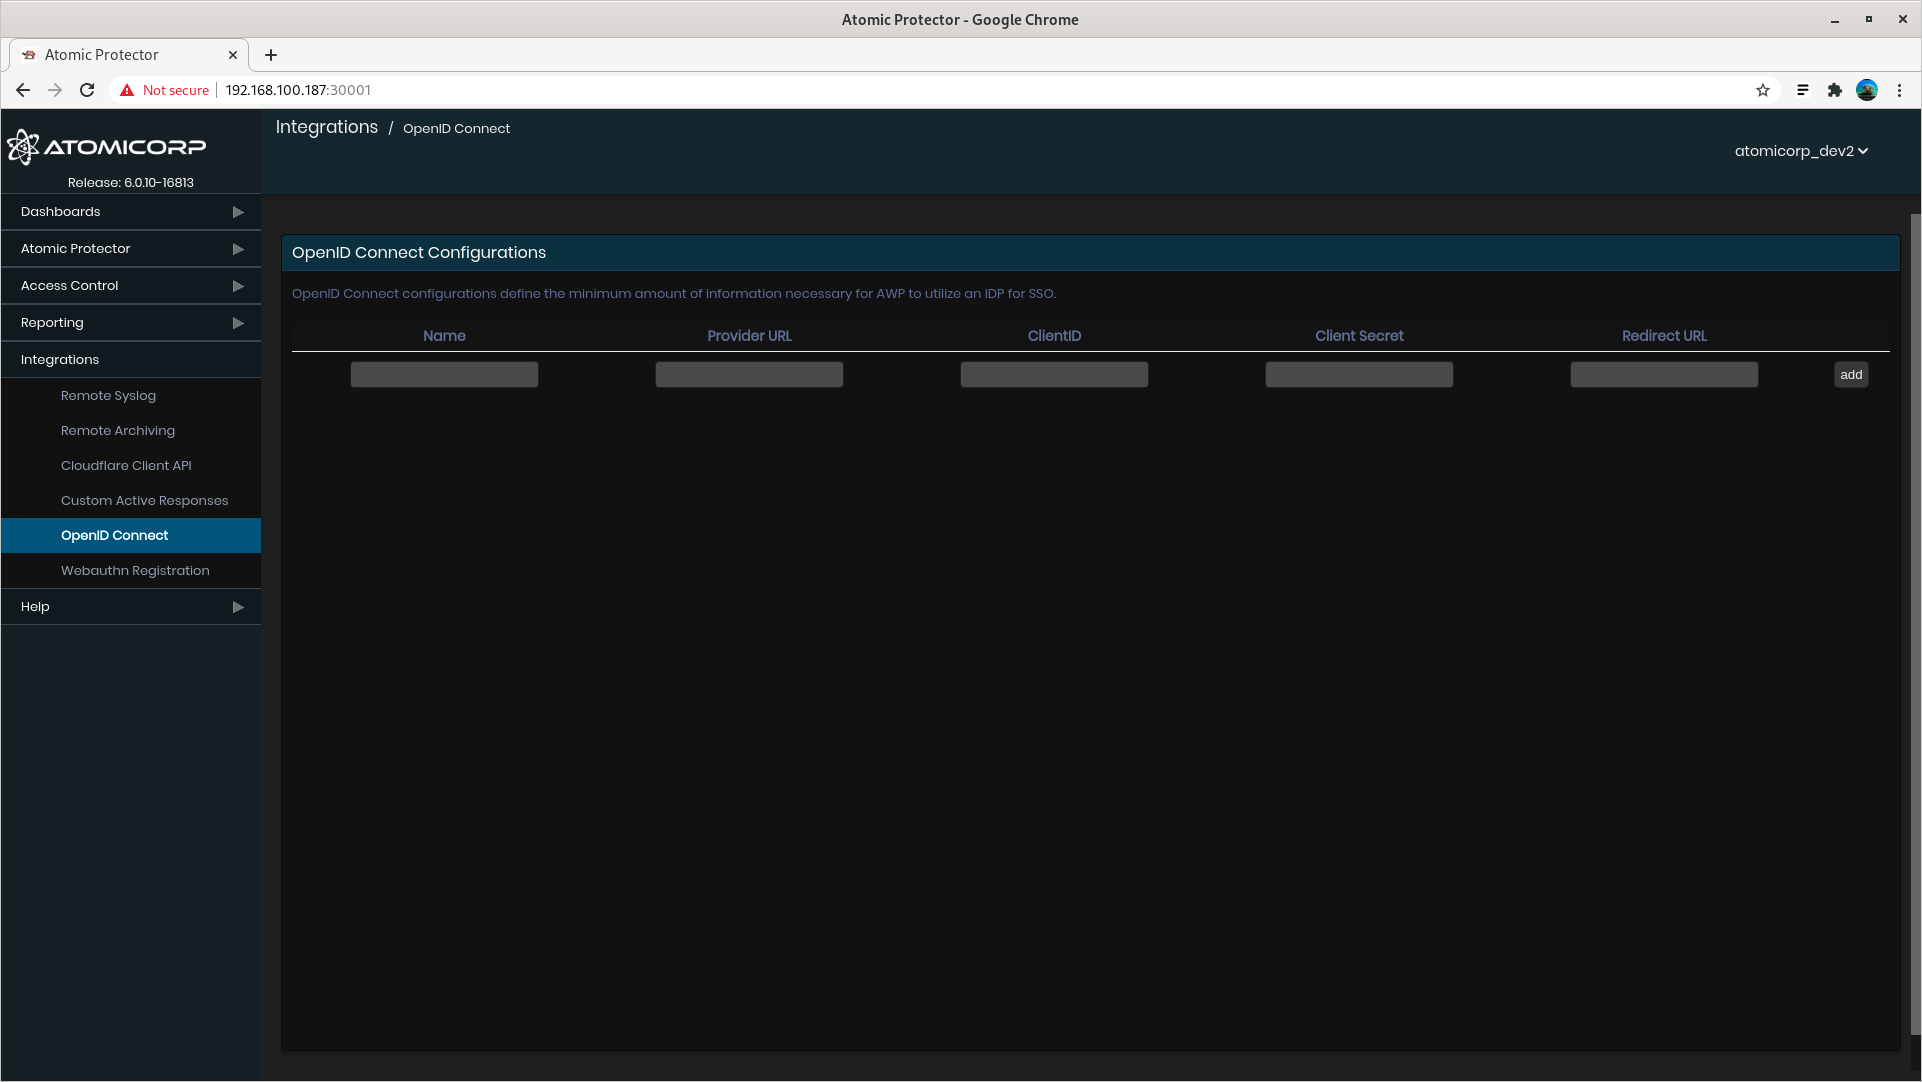
Step 3: Navigate to Integrations > OpenID Connect
Step 4: Enter OpenID credentials
Name: is an arbitrary name that displays on the login page
Provider URL is the endpoint of your OpenID Connect server
example: https://openid.server.com/endpoint
ClientID, ClientSecret, and Redirect URL are all provided by the OpenID Connect endpoint when AEO is first registered
ClientID example: 894664563140-361jamgdp65eflek6mv8l11ifa2l05tf.app.website.com
ClientSecret example: SV4bb77clx6m6Ntd_Z8df71S
Redirect URL example: http://fakedomain:30001/auth/app/callback (deprecated)
Okta
These are generic instructions, please refer to the Okta documentation for more detailed configuration options.
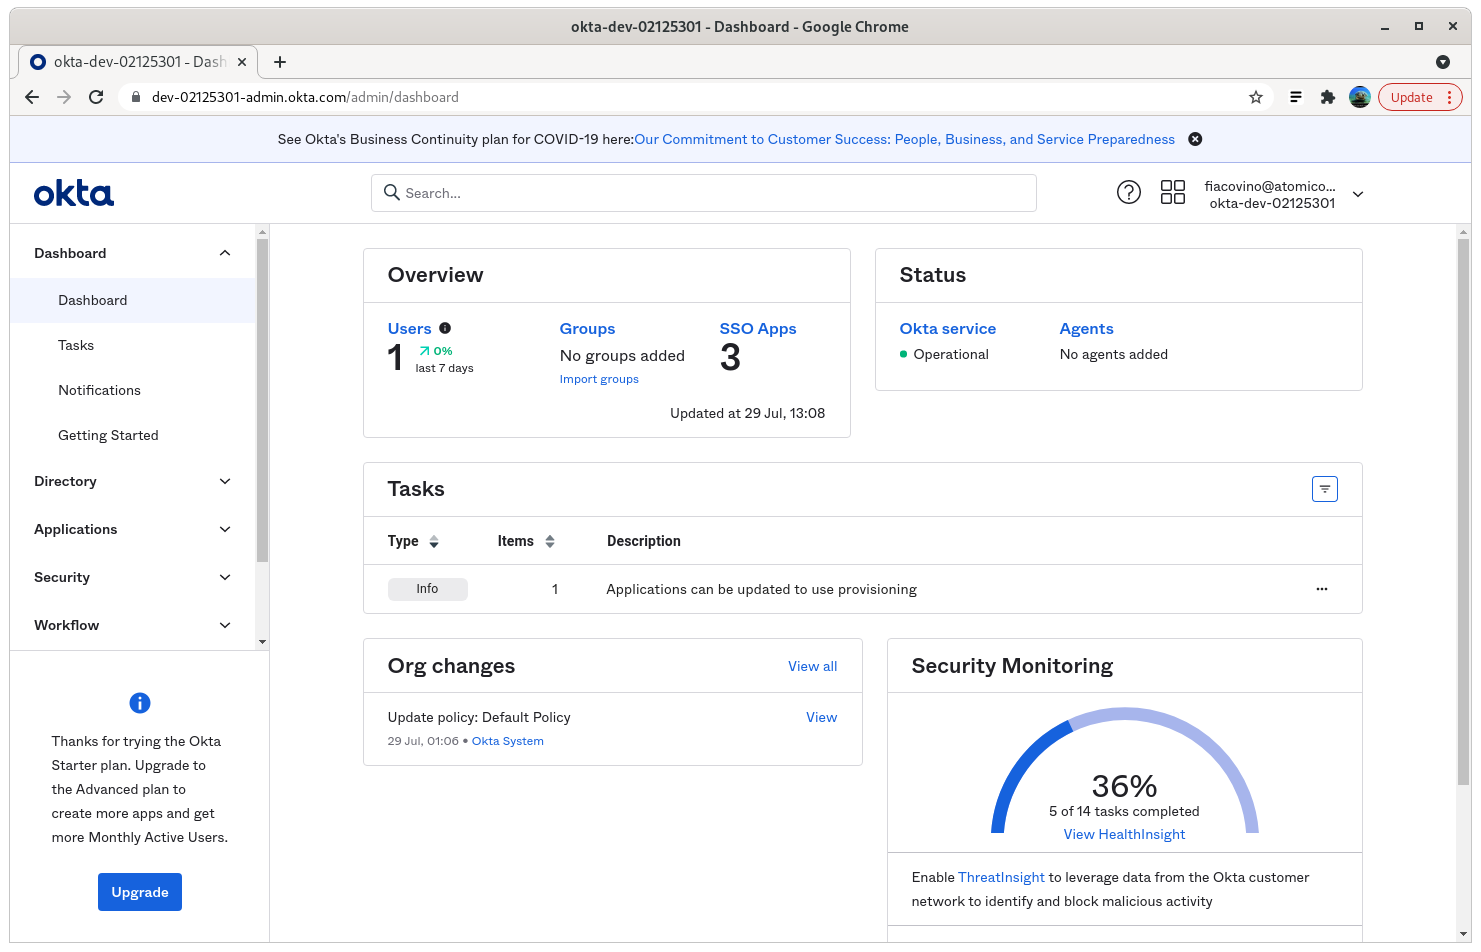
Step 1: Log in to your Okta domain
Example: https://dev-12345678-admin.okta.com/
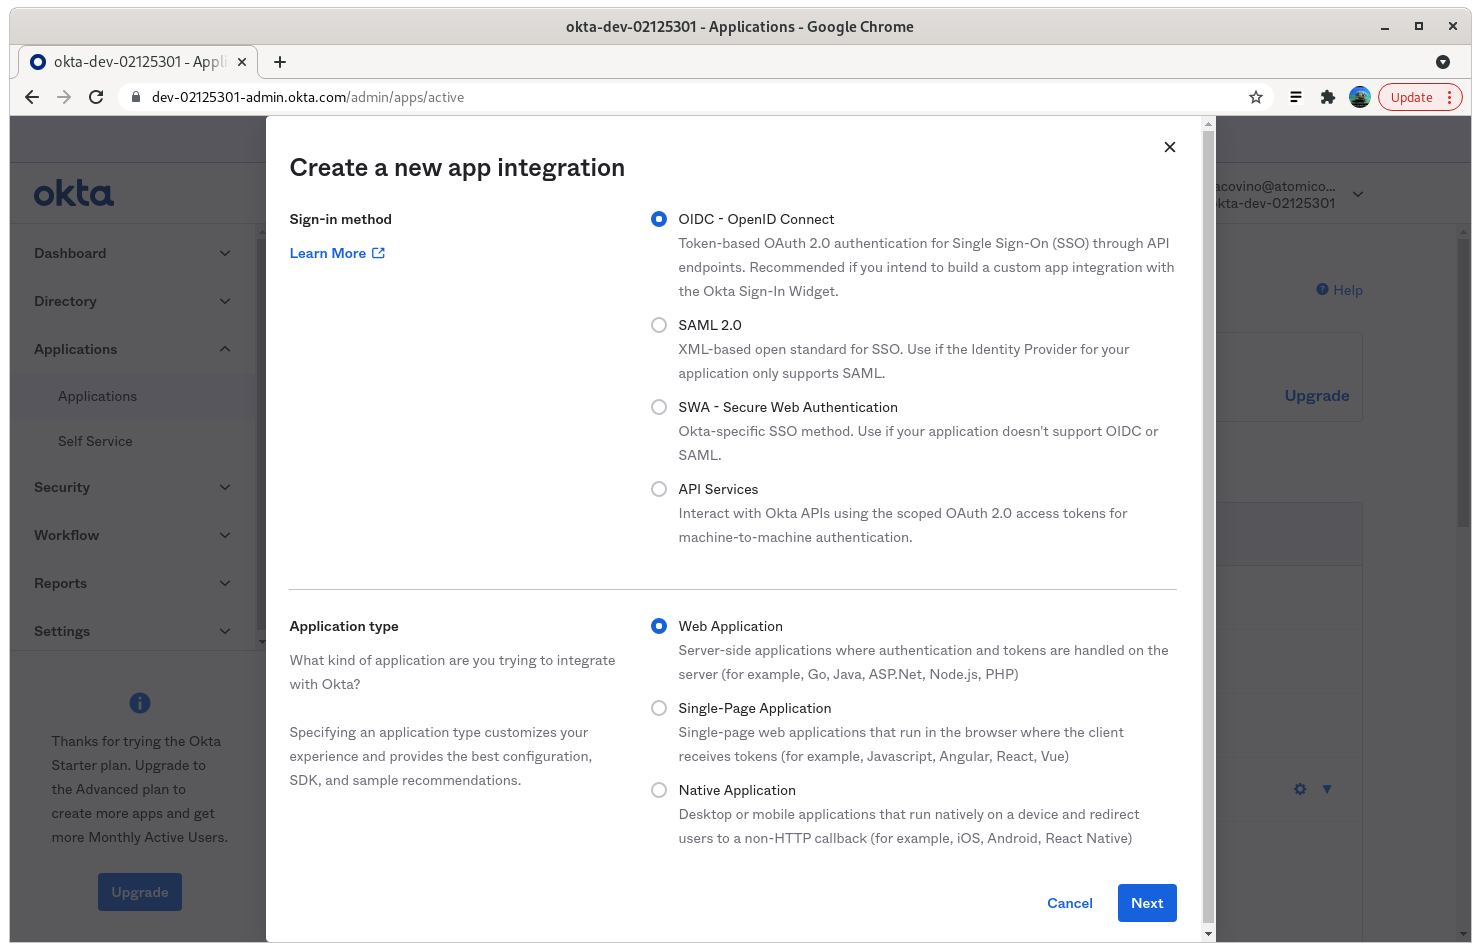
Step 2: Create App Integration
Step 3: Select OIDC - OpenID Connect, and Web Application
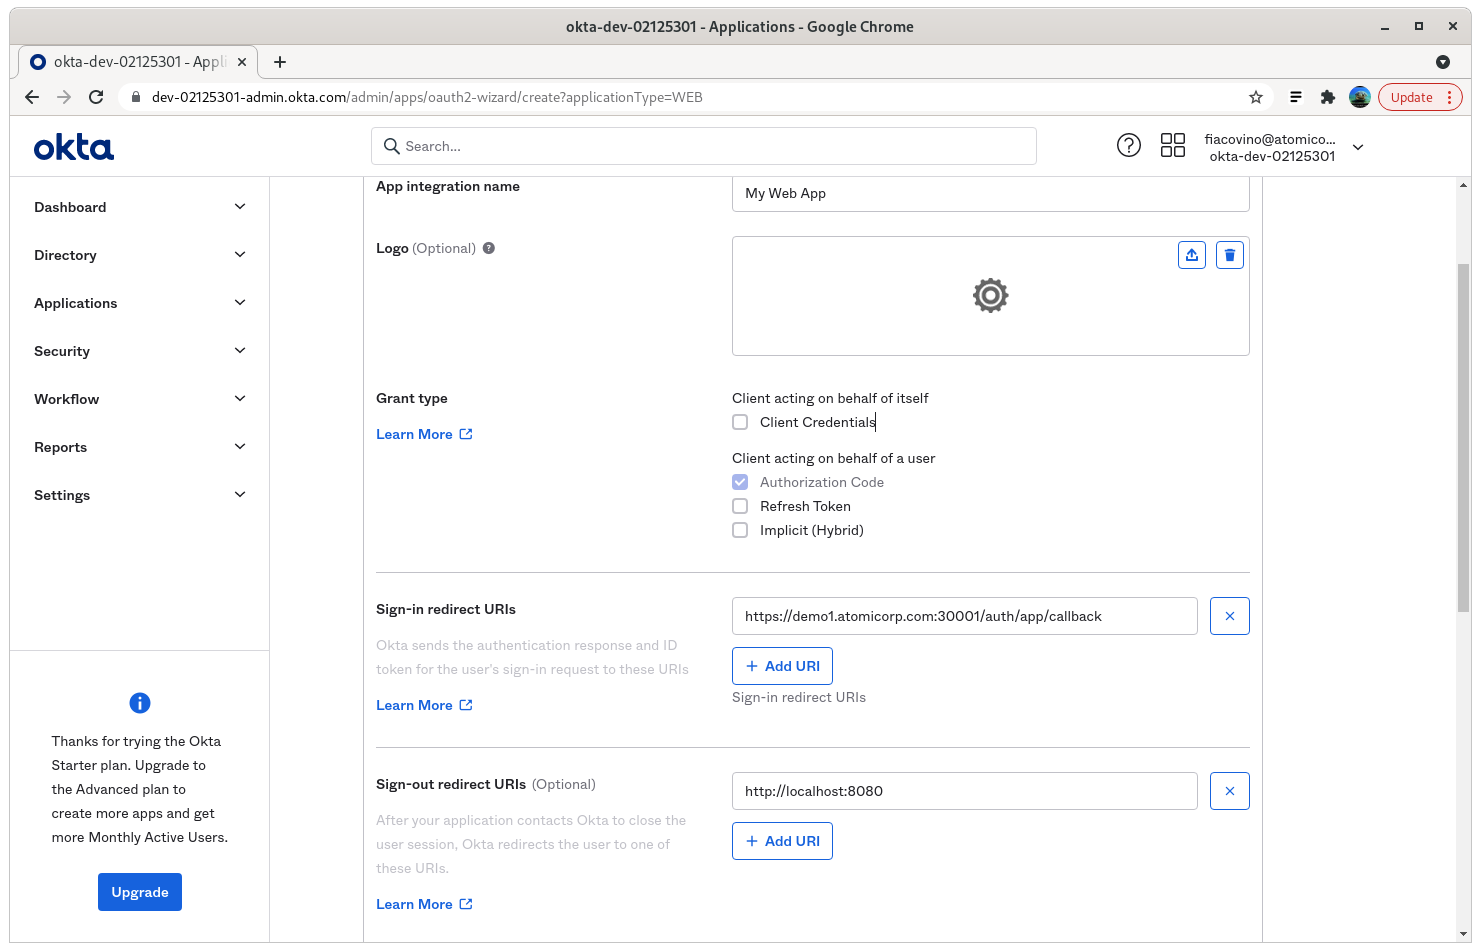
Step 4: Enter your application name, and Sign-in redirect URIs
Sign-in redirect URI: https://your-aeo-server:30001/auth/app/callback
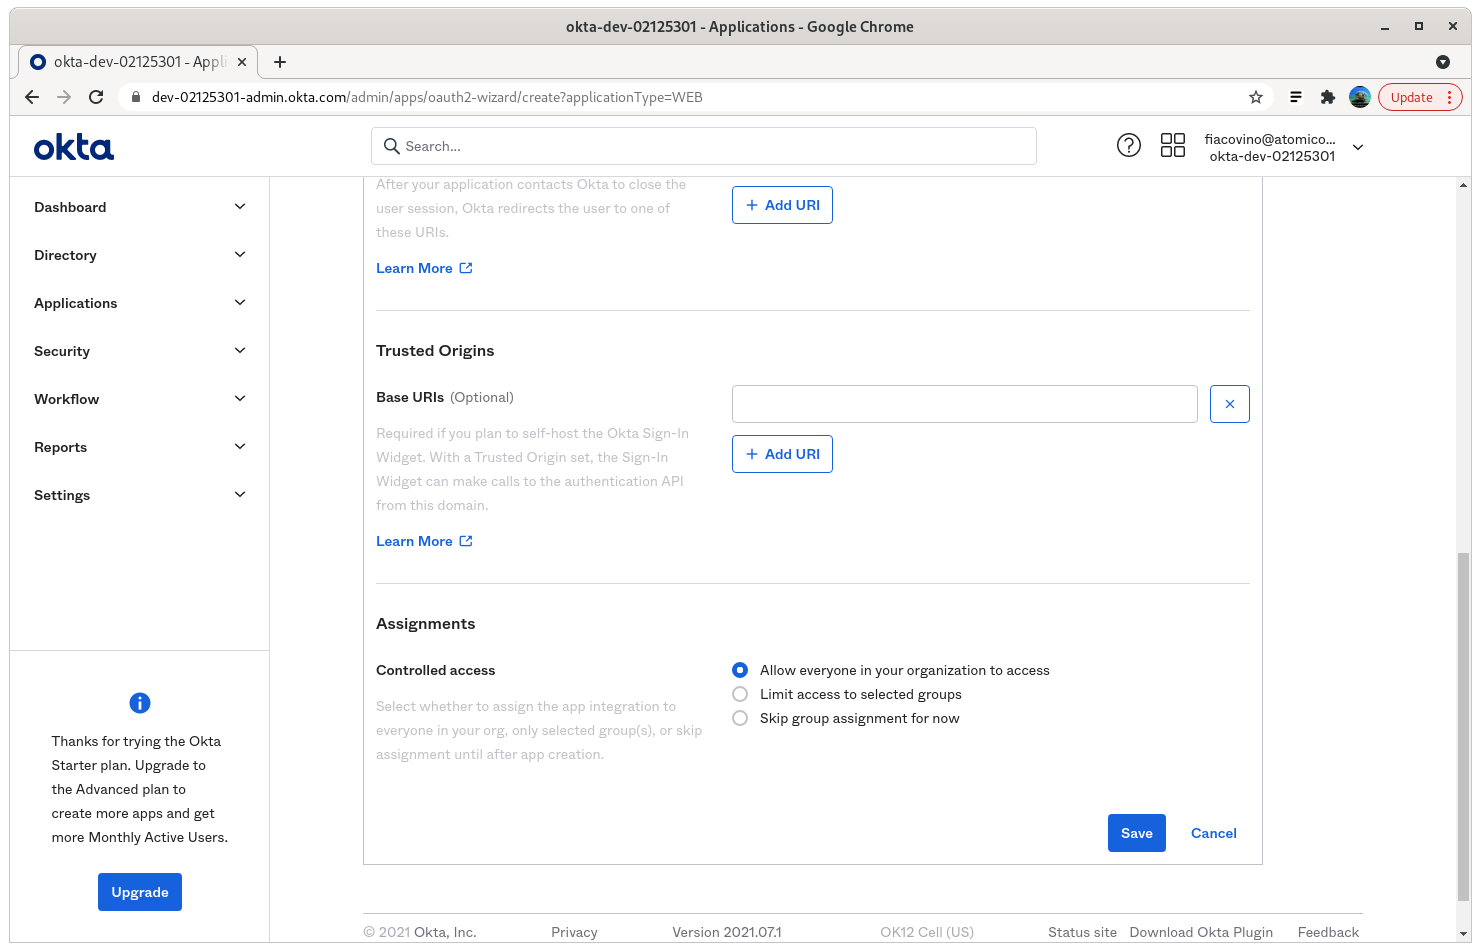
Step 5: Set the Assignments to the appropriate level for your organization
In this example, we are using “Allow everyone in your organization to access”. Note that the user account must still exist in AEO in order for the account to be able to access the console.
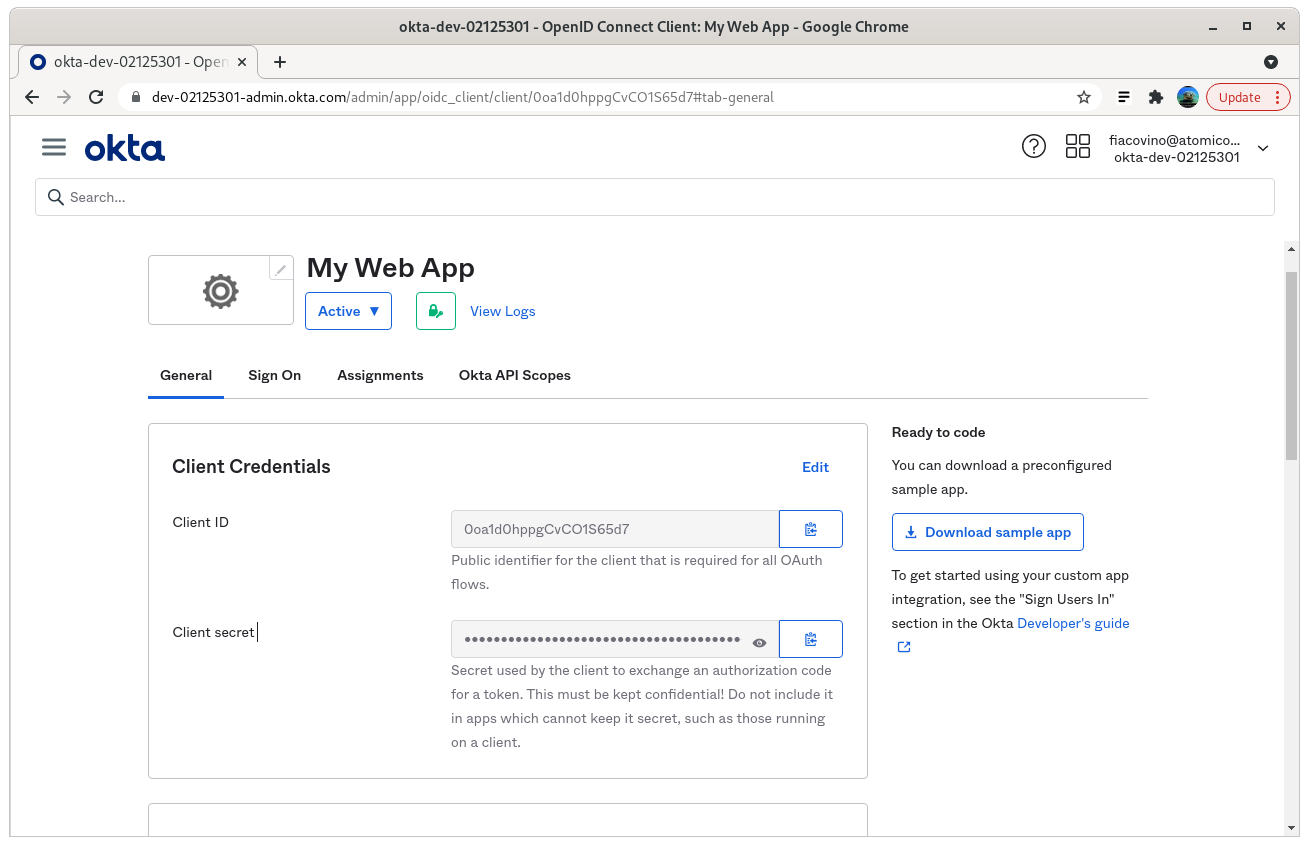
Step 6: click save and note the client credential, and secrets
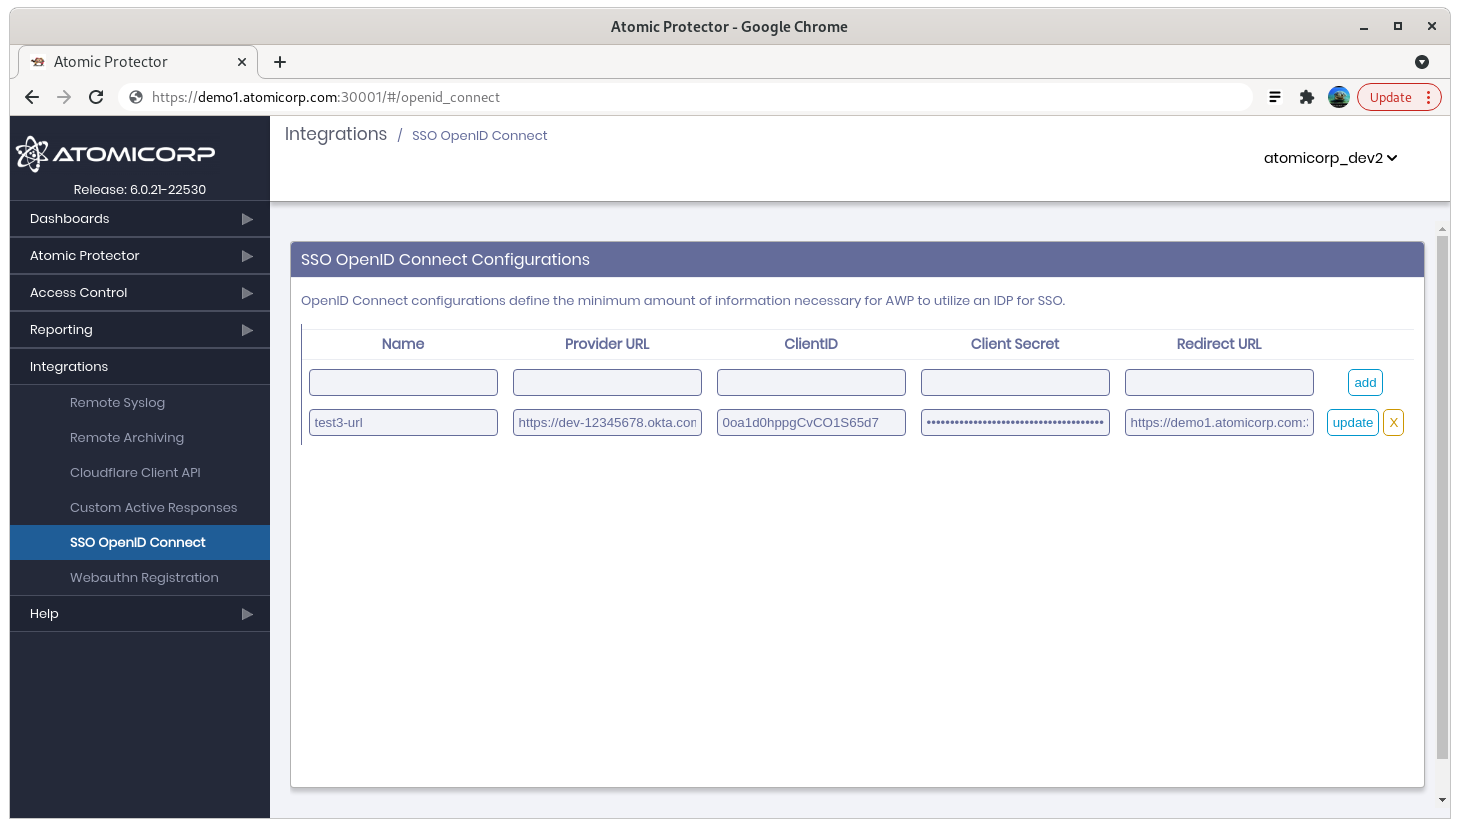
Step 7: Log into AEO, and select the Integration->SSO OpenID Connect
Name: is an arbitrary name that displays on the login page
Provider URL is the Okta openid provider in the format of: https://<value>.okta.com/oauth2/default
ClientID: from step 6 above
ClientSecret: from step 6 above
RedirectURL: https://your-aeo-server:30001/auth/app/callback
Step 8: Restart awpd
systemctl restart awpd
Troubleshooting
unable to match id token to application user: unable to find user with email username@domainname
This means that the user has not been created in the AEO console
